You’ve probably enjoyed a tuna melt at some point in your life, but have you ever considered its rich history or the secrets to making the perfect one? This humble sandwich has been a staple of American cuisine for decades, evolving from a simple diner offering to a beloved comfort food. Whether you’re a long-time fan or new to the tuna melt scene, there’s more to this classic than meets the eye. From its origins to the art of crafting the ideal balance of flavors and textures, you’ll discover why this sandwich continues to captivate taste buds and evoke nostalgia across generations.
Key Takeaways
- A tuna melt is a hot sandwich combining tuna salad with melted cheese, typically served on toasted bread.
- The dish originated in the 1950s as a variation of the grilled cheese sandwich, incorporating canned tuna.
- Essential ingredients include canned tuna, mayonnaise, cheese, and bread, with optional additions like celery or onions.
- Cooking involves assembling the sandwich and toasting it in a skillet until the bread is golden-brown and the cheese melts.
- Tuna melts are popular in diners and home kitchens, offering a quick, satisfying meal with a balance of flavors and textures.
History
The humble tuna melt has a rich history dating back to the mid-20th century. You’ll find its roots intertwined with the rise of canned tuna and the growing popularity of casual dining in America. As you explore the sandwich’s past, you’ll discover that it emerged as a variation of the classic grilled cheese, with inventive cooks adding tuna to create a heartier meal.
During the 1950s and 1960s, you’d often see tuna melts on diner menus across the country, quickly becoming a lunchtime favorite. The combination of creamy tuna salad and melted cheese on toasted bread appealed to Americans looking for a satisfying and convenient meal.
As you prepare your own tuna melt, you’re continuing a culinary tradition that’s been enjoyed for generations. The sandwich’s enduring popularity is a reflection of its simple yet delicious ingredients and the comforting flavors it offers. Whether you’re making it at home or ordering one at a local diner, you’re participating in a slice of American food history that continues to evolve and delight taste buds today.
Recipe
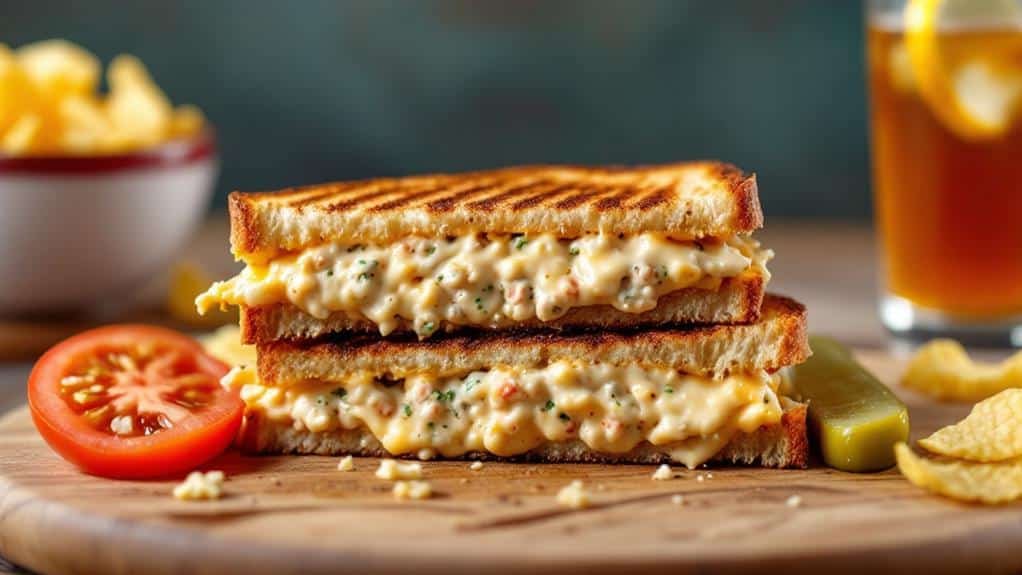
The classic tuna melt is a cherished comfort food that combines the rich flavors of tuna salad with melted cheese. This simple yet satisfying sandwich has been a staple in diners and home kitchens for decades, offering a quick and easy meal option for those looking for a delicious and filling bite.
This simplified version of the tuna melt recipe uses only five ingredients, making it an ideal choice for busy individuals or those who prefer simple cooking. By focusing on essential components, this recipe allows the natural flavors of the tuna and cheese to shine through, creating a harmonious blend of savory and creamy textures.
- 1 can (5 oz) tuna, drained
- 2 tablespoons mayonnaise
- 2 slices cheese (cheddar or Swiss)
- 4 slices bread
- 2 teaspoons butter
In a bowl, mix the drained tuna with mayonnaise until well combined. Spread the tuna mixture evenly onto two slices of bread. Top each with a slice of cheese and cover with the remaining bread slices. Heat a skillet over medium heat and melt 1 teaspoon of butter. Place the sandwiches in the skillet and cook for 3-4 minutes until golden brown. Carefully flip the sandwiches, add the remaining butter to the skillet, and cook for an additional 2-3 minutes until the cheese is melted and the bread is toasted to your liking.
For best results, use a sturdy bread that can hold up to the weight of the tuna mixture and cheese. Experiment with different types of cheese to find your preferred flavor combination. To add extra crunch and flavor, consider adding sliced pickles, tomatoes, or red onions to your tuna melt. Remember to press down gently on the sandwich while cooking to make sure of even heating and a crispy exterior. If you prefer a lighter version, you can use Greek yogurt instead of mayonnaise or opt for whole grain bread for added fiber.
Cooking Steps
To create your perfect tuna melt, you’ll start by draining and flaking the canned tuna, then mixing it with just the right amount of creamy mayonnaise to achieve a smooth, spreadable consistency.
Next, you’ll assemble your sandwich by generously spreading the tuna mixture onto a slice of bread, topping it with your favorite cheese, and placing it in a preheated skillet that’s been lightly buttered for that golden, crispy exterior.
As the bread toasts to a beautiful golden brown, you’ll carefully flip the sandwich, allowing the cheese to melt and create that irresistible gooey texture that defines a classic tuna melt.
Step 1. Drain and Flake Tuna
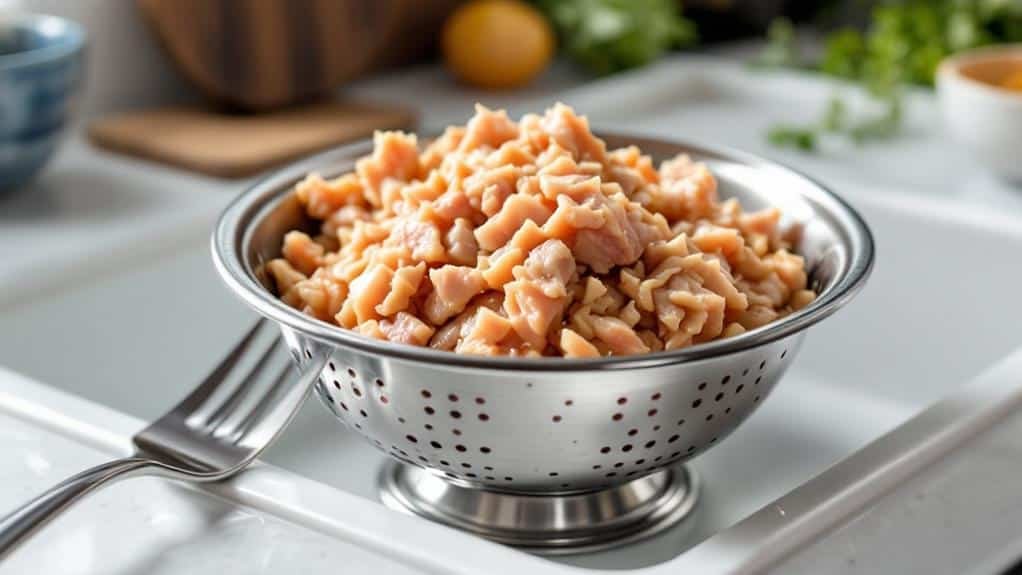
Before assembling your tuna melt, you’ll need to properly prepare the canned tuna. Start by opening the can carefully, making sure you don’t spill any of the liquid inside. Once open, you’ll notice the tuna is packed in either water or oil. Regardless of which type you’re using, it’s important to drain the liquid thoroughly.
To do this, hold the opened can over the sink and use the lid to press down on the tuna, allowing the liquid to escape. You’ll want to drain as much as possible to prevent your sandwich from becoming soggy.
After draining, transfer the tuna to a bowl. Using a fork, gently flake the fish into smaller, bite-sized pieces. This process not only makes the tuna easier to mix with other ingredients but also guarantees a more even distribution throughout your sandwich.
As you flake, you might notice any remaining liquid – be sure to drain this off as well. The goal is to achieve a consistency that’s moist enough to hold together but not watery. This preparation method, which has been used for decades in diners across America, is essential for creating the perfect tuna melt texture.
Step 2. Mix Tuna With Mayonnaise
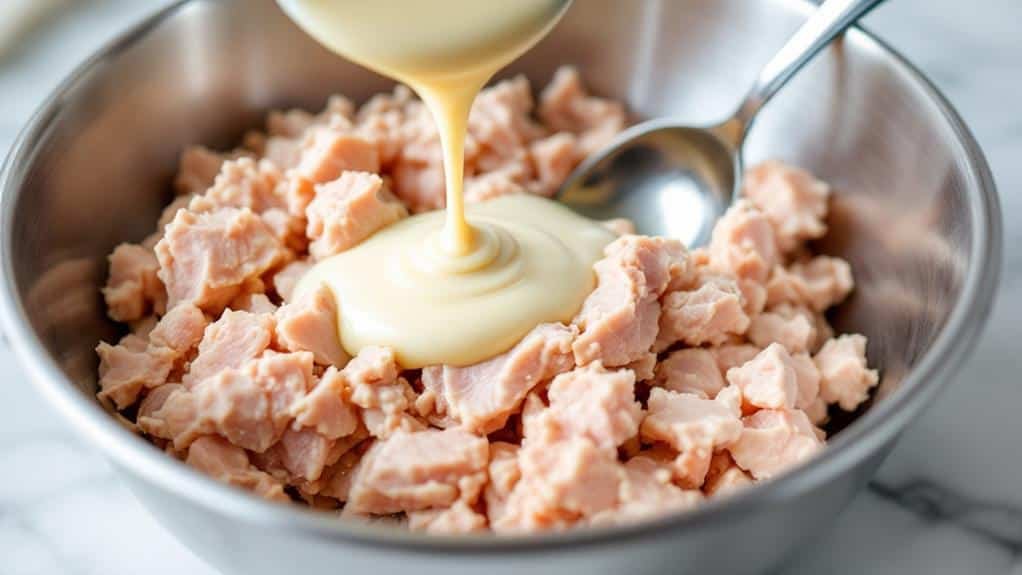
After draining and flaking your tuna, it’s time to mix it with mayonnaise. This pivotal step will bind the tuna together and create a creamy texture that’s essential for a classic tuna melt.
In a medium-sized bowl, combine the flaked tuna with mayonnaise, starting with a small amount and gradually adding more until you reach your desired consistency. You’ll want the mixture to be moist and spreadable, but not overly wet or soupy.
As you mix, use a fork to gently fold the mayonnaise into the tuna, ensuring that every flake is coated evenly. This technique, which has been used for generations, helps to distribute the flavors uniformly throughout the mixture.
While stirring, you’ll notice the tuna’s texture becoming smoother and more cohesive. The mayonnaise not only adds creaminess but also enhances the tuna’s natural flavors, creating a harmonious blend that’ll make your taste buds sing.
Step 3. Assemble Sandwich on Bread

With your tuna and mayonnaise mixture ready, it’s time to build your sandwich. Take two slices of bread, preferably a sturdy variety that’ll hold up to the moist filling. Spread the tuna mixture generously on one slice, making certain to cover it from edge to edge. This even distribution guarantees you’ll get a taste of tuna in every bite.
Next, place a slice of cheese on top of the tuna. Cheddar is a classic choice, but feel free to experiment with other types like Swiss or provolone for a twist on the traditional flavor.
Now, you’re ready to close your sandwich with the second slice of bread. As you do this, press down gently to compact the filling slightly, which will help prevent it from spilling out during cooking.
The tuna melt, a diner staple since the 1960s, has come a long way from its humble beginnings. Your homemade version carries on this delicious tradition, offering a perfect balance of creamy tuna and gooey melted cheese.
With your sandwich assembled, you’re just moments away from enjoying this comforting classic.
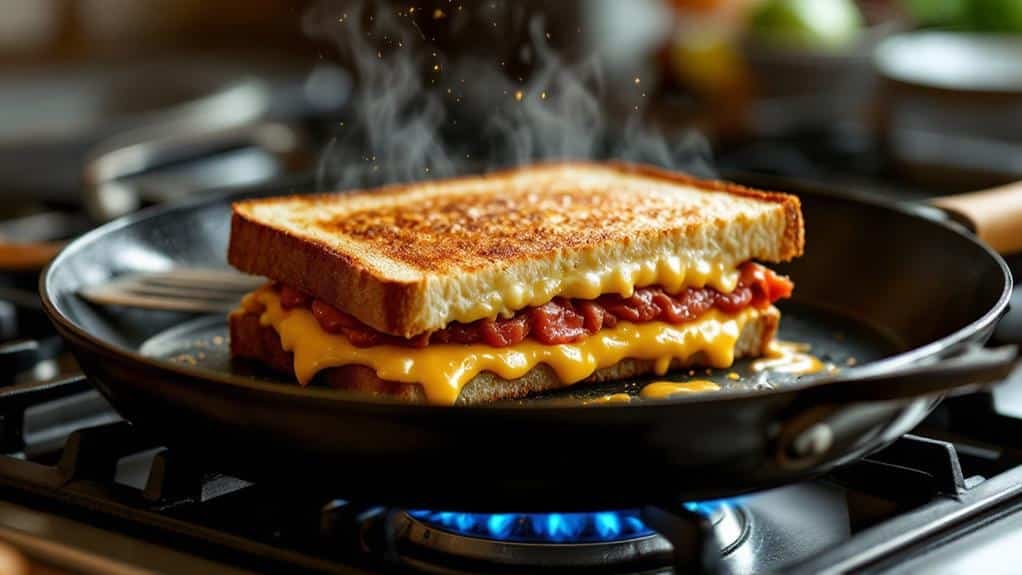
Step 4. Toast Bread in Skillet
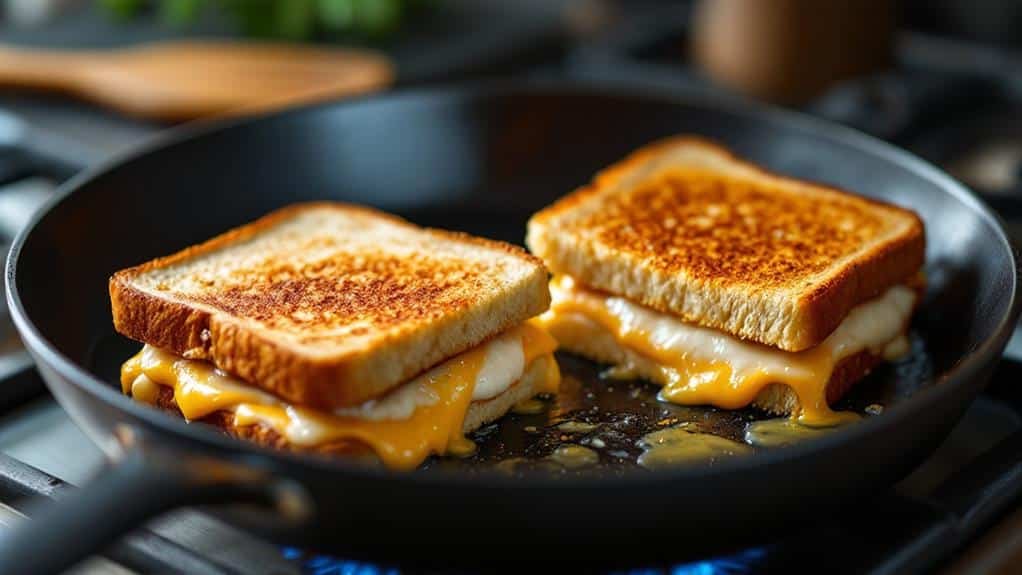
The next step in creating your perfect tuna melt is toasting the sandwich to golden-brown perfection.
Heat a skillet over medium heat, allowing it to warm up evenly. While the pan heats, lightly butter the outside of your assembled sandwich, which will help create that irresistible crispy exterior. Once the skillet is hot, carefully place your sandwich in the center, listening for that satisfying sizzle as it makes contact with the pan.
As the bread toasts, you’ll notice a warm, nutty aroma filling your kitchen, a telltale sign that you’re on the right track. After about 3-4 minutes, when the bottom slice has turned a rich golden color, it’s time to flip. Using a spatula, gently turn the sandwich over, being careful not to disturb the melting cheese inside.
Press down lightly with the spatula to make sure even cooking and to help the cheese melt thoroughly. Cook for another 3-4 minutes, until both sides are perfectly toasted and the cheese has melted into a gooey, delicious layer.
Step 5. Flip and Melt Cheese
Precision is essential when it’s time to flip your tuna melt and melt the cheese to perfection. As the bottom of your sandwich turns golden brown, it’s pivotal to keep a watchful eye on its progress.
When you notice the edges becoming crisp and the bread taking on a warm, toasty hue, it’s time to make your move. Using a wide, flat spatula, swiftly slide it under the sandwich, ensuring you’ve got a firm grip on the entire base.
In one smooth motion, flip the tuna melt over, allowing the uncooked side to sizzle as it hits the hot skillet. You’ll hear a satisfying sizzle, a sound that’s been delighting sandwich enthusiasts for decades.
Now, as the second side cooks, the heat will begin to work its magic on the cheese. Watch as it starts to soften and melt, oozing slightly from the edges of the bread. This process, which typically takes about 2-3 minutes, transforms your tuna melt from a simple sandwich into a gooey, comforting masterpiece.
The result is a harmonious blend of crispy exterior and creamy interior, a true indication of the enduring appeal of this classic dish.
Final Thoughts
You’ll find that mastering the art of the tuna melt is a rewarding experience. As you perfect your technique, you’ll discover the joy of creating a simple yet satisfying meal that’s been enjoyed for generations.
The combination of crispy, buttery bread and gooey melted cheese, paired with the savory tuna mixture, creates a symphony of flavors and textures that’ll delight your taste buds.
Frequently Asked Questions
Can Tuna Melts Be Made Ahead and Reheated?
Ever wondered about make-ahead meals? You can prepare tuna melts in advance, but they’re best fresh. If you must, assemble them without toasting, refrigerate, and reheat in a skillet or oven. They’ll lose some crispiness but remain tasty.
Are There Any Low-Carb Alternatives for the Bread in Tuna Melts?
You can use low-carb alternatives for bread in your melts. Try lettuce wraps, cucumber slices, or portobello mushroom caps. You’ll also find low-carb tortillas or cloud bread recipes online. These options reduce carbs while maintaining flavor.
What Are Some Vegetarian Substitutes for Tuna in This Sandwich?
You can replace tuna with mashed chickpeas, tempeh, or jackfruit for a vegetarian twist. Try using seaweed flakes to mimic the fishy flavor. Don’t forget to season well and add some texture with chopped celery or onions.
How Long Can Prepared Tuna Salad Be Stored in the Refrigerator?
You can store prepared tuna salad in your refrigerator for 3-5 days. Make sure it’s in an airtight container and kept at or below 40°F (4°C). Don’t leave it out at room temperature for more than 2 hours.
Can Tuna Melts Be Frozen for Later Consumption?
You can freeze them, but you’ll notice changes. Texture suffers, flavors dull, and bread turns soggy. If you do freeze, wrap tightly and consume within a month. For best results, it’s better to prepare fresh when possible.