Did you know that the secret to perfect chicken tenders lies not just in the batter, but also in the marination? Yes, you're right! It's all about soaking those succulent pieces in a marinade that's bursting with flavor. The best part is, you can whip up this tasty dish right in your own kitchen with minimal effort. Intriguing, isn't it? But wait, there's more to these simple yet scrumptious chicken tenders that we need to explore. So why not hang around to find out?
Key Takeaways
- Chicken tenders are made from tenderloin part of the chicken breast, breaded, and fried.
- Key ingredients include chicken tenderloins, flour, eggs, panko breadcrumbs, and spices.
- The cooking process involves marinating, breading, frying, and draining the chicken.
- Enhance the taste with seasonings and serve with various dips like honey mustard or barbecue sauce.
- For best results, use good quality chicken and let the tenders rest before serving.
History
Born out of convenience, the history of chicken tenders is quite interesting. You might think they've been around for ages, but they're a relatively recent addition to the culinary world. Debuting in the early 1990s, they were initially a way for restaurants to use up the tenderloin part of the chicken breast, which has a naturally tender texture and is often discarded in other preparations.
It was a hit! Customers loved the bite-sized pieces of juicy chicken encased in a crispy, flavorful coating. In fact, they became so popular that they quickly made their way into fast food chains and supermarket frozen food sections. In no time, chicken tenders became a beloved comfort food across America.
But, it's not just their convenience that makes them popular. They're also a perfect canvas for so many flavors and sauces. From spicy buffalo to sweet and tangy BBQ, there's a chicken tender to satisfy every palate. Whether you're a kid or a kid at heart, there's no denying the simple pleasure of a well-made chicken tender.
Recipe
Easy chicken tenders are a versatile and delicious option for a quick dinner or a tasty snack. They're surprisingly simple to make at home, and they can be customized with your favorite seasonings or sauces. Whether you're feeding a family, entertaining guests, or just looking for a comforting meal, this recipe is sure to be a hit.
The key to a great chicken tender is the combination of a crispy, flavorful crust and a juicy, tender interior. This recipe uses a simple breading process and a quick fry to achieve this perfect balance. It's a great way to get restaurant-quality chicken tenders without the restaurant price!
Ingredients:
- 1 lb chicken tenderloins
- 1 cup all-purpose flour
- 2 eggs
- 2 cups panko breadcrumbs
- 1 tsp garlic powder
- 1 tsp onion powder
- 1 tsp paprika
- Salt and pepper to taste
- Vegetable oil for frying
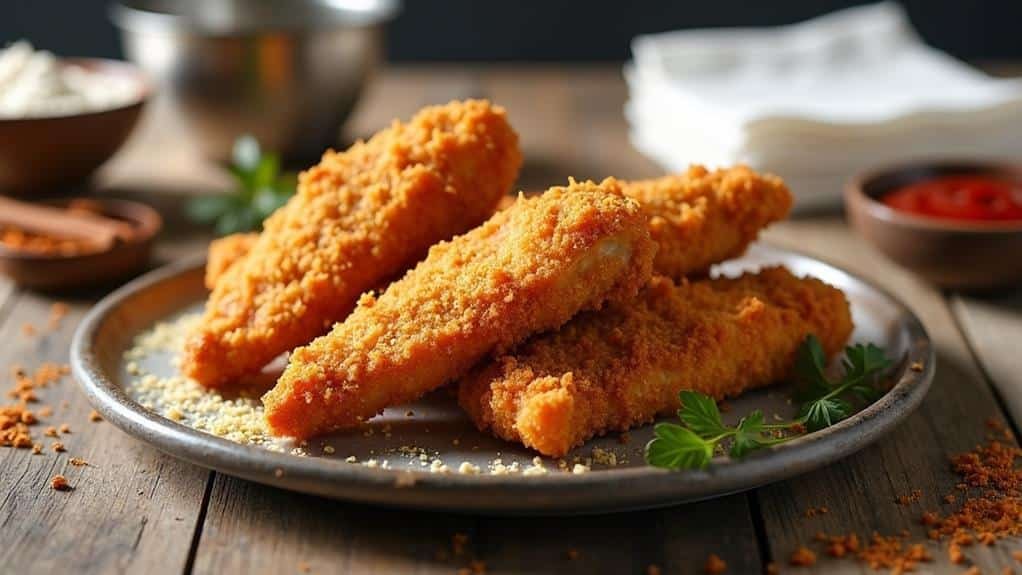
To prepare the chicken tenders, start by seasoning the chicken with salt, pepper, garlic powder, onion powder, and paprika. Then, set up a breading station with flour, beaten eggs, and panko breadcrumbs. Dredge each tenderloin in the flour, dip in the egg, and then coat in the breadcrumbs. Heat the vegetable oil in a large skillet or deep fryer until it reaches 375 degrees F. Fry the chicken tenders until they're golden brown and cooked through, about 3-4 minutes per side. Drain on paper towels and serve hot.
Before cooking these chicken tenders, there are a few tips to keep in mind. First, be sure to season the chicken well before breading it. This will help the flavors penetrate the meat and give the tenders more depth. Second, don't overcrowd the pan when frying the chicken. If there are too many tenders in the pan at once, the temperature of the oil can drop and the tenders won't get as crispy. Finally, be sure to let the chicken drain on paper towels after frying to remove excess oil and keep the breading crispy. Enjoy your homemade, easy chicken tenders!
Cooking Steps
You're ready to start cooking! From the first steps of the process, through marinating the chicken, preparing the breading, frying the tenders, and finally, the finishing touches, you're in control. So, let's roll up our sleeves and get those chicken tenders sizzling.
Step 1. Beginning of Cooking Process
Let's jump right into the cooking process. First, you'll need to gather your ingredients. This includes chicken, your choice of flour, bread crumbs, and a selection of spices that cater to your taste buds. You may also need some eggs for the batter, so be sure to have a few on hand.
Next, you'll want to prepare your workspace. Cleanliness is key in any kitchen, so make sure your countertops are wiped clean and you've got a cutting board ready for use. You'll also need a sharp knife to cut the chicken into strips, so be careful!
Now, it's time to cut your chicken. Remember, you're making chicken tenders, so you'll want to cut your chicken into long strips. The size of the strips is really up to you, but generally, they should be about the size of your index finger.
Once you've got your chicken cut, it's time to prepare the batter. This is where your eggs, flour, bread crumbs, and spices come in. But remember, we're not discussing the marinating stage just yet. That's a topic for another time. For now, you're ready to start cooking. Enjoy the process, and stay tuned for the next steps!
Step 2. Marinating Chicken Stage
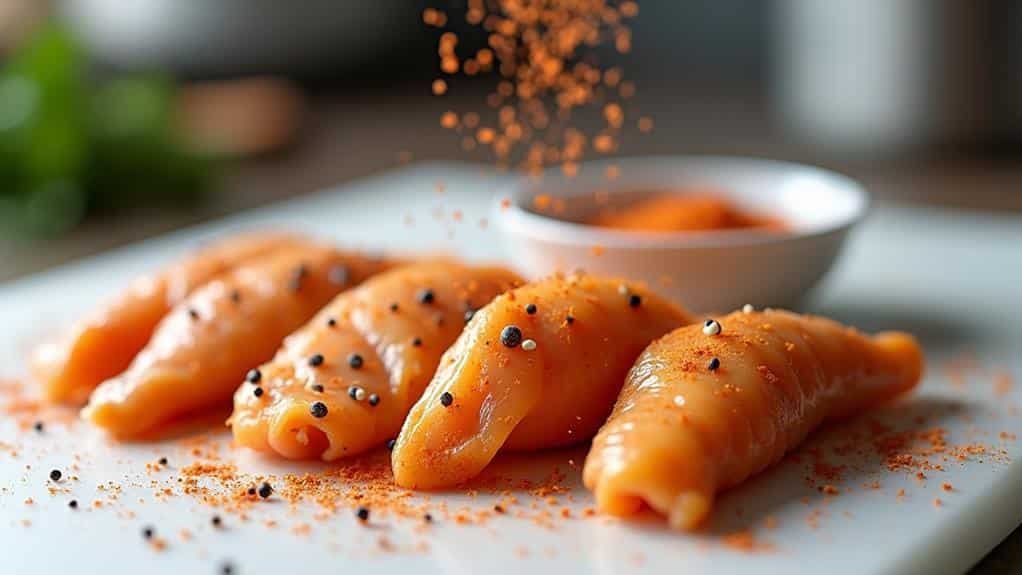
Diving into the marinating stage, it's time to infuse those chicken strips with flavor. You're probably wondering, why marinate? Well, it's simple. Marinating not only tenderizes your chicken but also helps to deeply penetrate it with the flavors of your choice.
Start by choosing your marinade, it could be as simple as olive oil, lemon juice, and your favorite herbs and spices. You might go for something a little more adventurous, like a spicy Asian or a tangy BBQ marinade. Whatever you choose, ensure it's well mixed and ready to envelop your chicken strips.
Now, place your chicken in a bowl or zip-lock bag, pour in your marinade, and make sure each strip is well coated. Seal the bag or cover the bowl and pop it in the fridge. Aim for a marinating time of at least 30 minutes, but if you can leave it for a couple of hours or even overnight, you'll be rewarded with super flavorful, juicy chicken tenders.
Step 3. Breading Preparation Stage
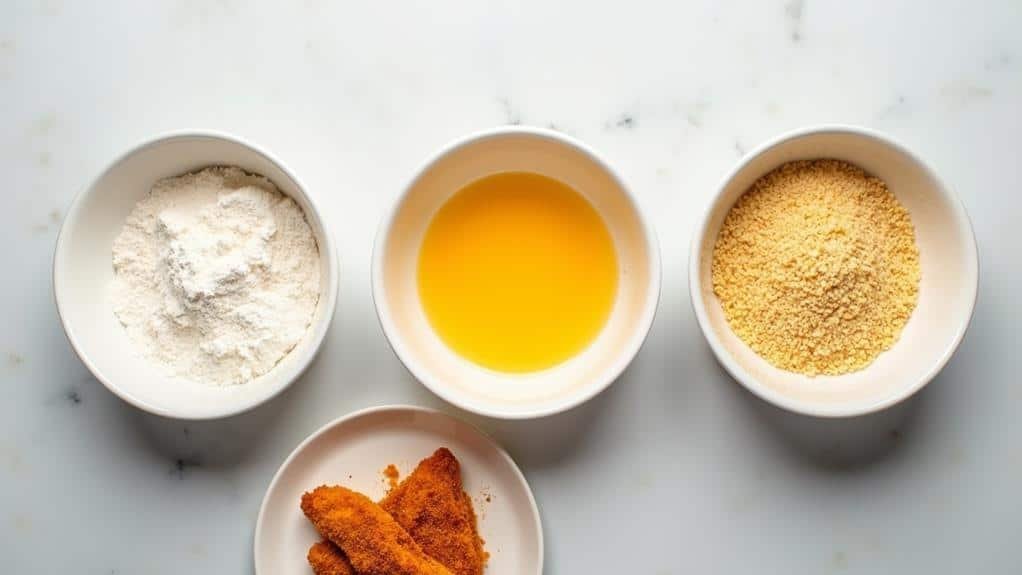
Once your chicken has soaked up all those mouthwatering flavors, it's time to get that crispy, golden coating ready. The breading stage, my friend, is where the magic truly happens. This is where you give your tenders that crunchy exterior everyone craves.
You'll need a couple of shallow dishes. In the first, whisk together flour, salt, and pepper. This will be your base coating. It's simple, but it's the foundation of that delicious crunch we're after.
In the second dish, crack a couple of eggs and beat them until they're well-mixed. The egg mixture will be the glue that helps the breadcrumbs stick to the chicken.
Finally, it's time for the star of the show – the breadcrumbs. Use your favorite type – panko for a light, airy crunch, or traditional breadcrumbs for a classic, hearty texture. Season them with a bit of garlic powder and paprika for an extra kick.
Now, take a tender from the marinade, roll it in the flour, dunk it in the egg, and coat it well with the breadcrumbs. Repeat with the rest and voila! You've just nailed the breading stage.
Next up? Frying those beauties to perfection.
Step 4. Frying Chicken Tenders Stage
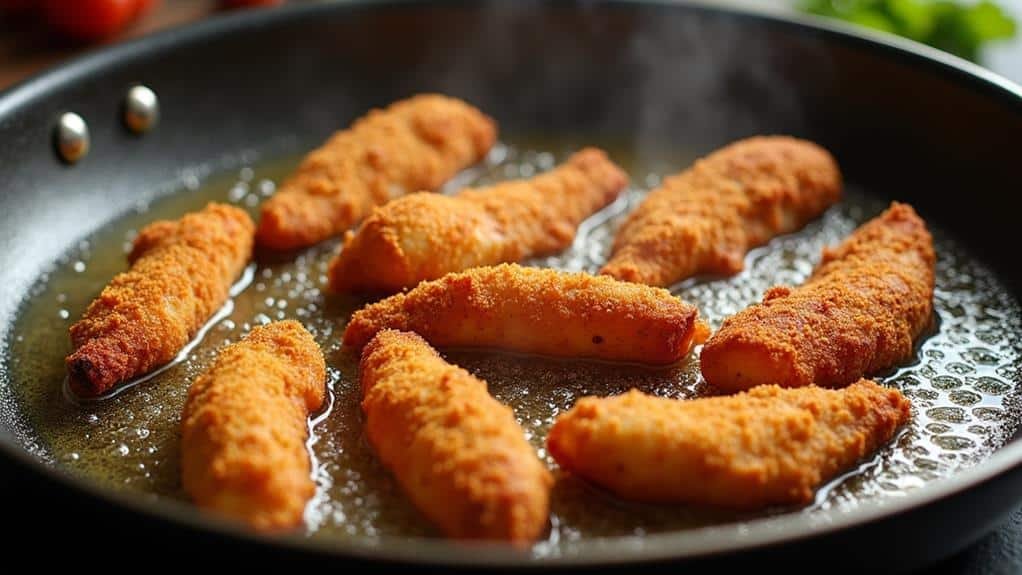
Ready to bring the heat? Now's your moment!
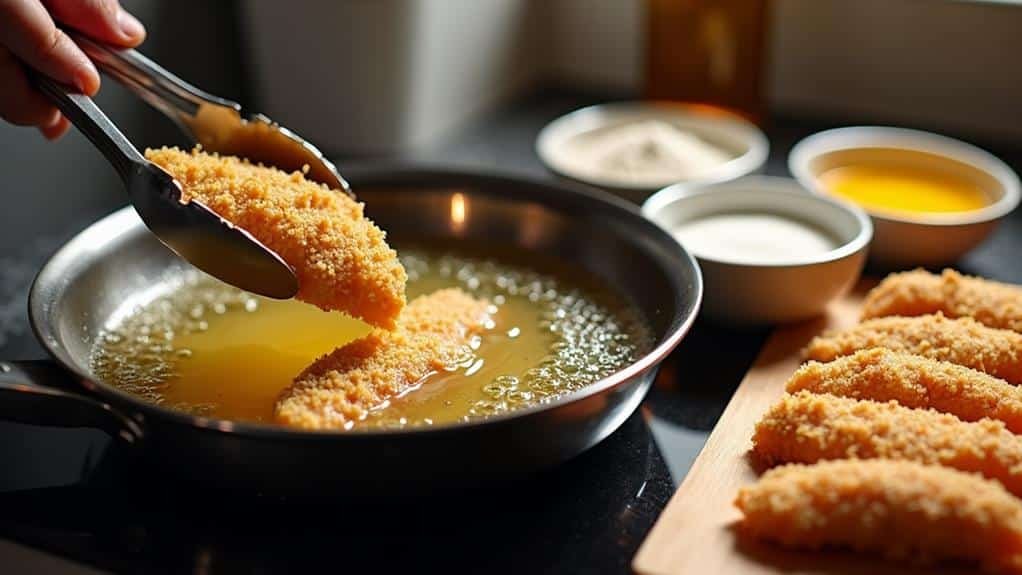
First, you'll need to heat your oil. Pour enough into your frying pan to fully submerge the chicken tenders, typically about two inches deep. Turn the heat to medium and let the oil warm up. It's critical to get the temperature right; too hot and the outside burns before the inside cooks, too cool and they'll be greasy. The magic number? About 350 degrees Fahrenheit.
Now, it's go-time. Carefully lower your breaded tenders into the hot oil. Don't overcrowd the pan, you're not going for a chicken tender party here. Cook them in batches if necessary.
You're aiming for a golden-brown color, usually about three to four minutes per side.
Once they're the right shade of delicious, use tongs or a slotted spoon to remove them from the pan. Place them on a wire rack or a plate lined with paper towels to drain excess oil.
Step 5. Final Cooking Stage
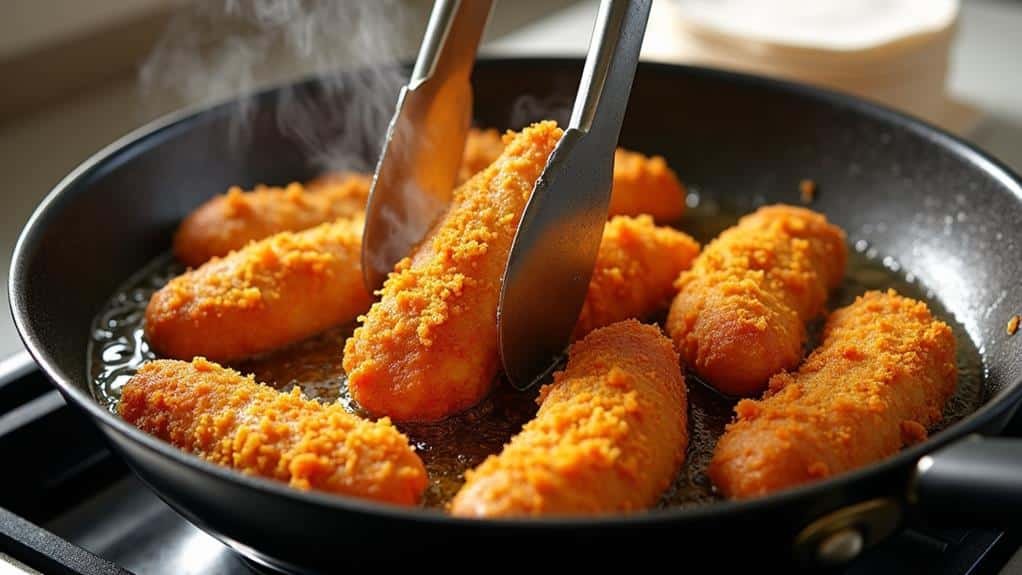
Now we're at the final stage of the cooking process, the part where all your hard work really starts to pay off. At this point, your chicken tenders are golden brown and crispy, just begging to be devoured. But hold on, they're not quite done yet.
Before you dig in, transfer those beauties to a wire rack. This will allow any excess oil to drain off, ensuring your tenders stay nice and crispy. Give them a few minutes to cool down.
Meanwhile, you can start on the final touch: the seasoning.
Sprinkle a dash of salt and pepper over your chicken tenders. Don't forget to flip them over and season the other side too. If you're feeling adventurous, you could even experiment with other spices like paprika or garlic powder.
Final Thoughts
In wrapping up, it's clear that these easy chicken tenders are a simple yet delicious addition to your cooking repertoire. You've seen how, with just a few ingredients and minimal time, you can whip up a dish that's sure to be a hit with both kids and adults. Not only are they a breeze to make, but the taste is also unbeatable – crispy on the outside, juicy and tender on the inside.
Remember, good quality chicken is the key. And don't forget to let those tenders marinate. It's a step you might be tempted to skip, but trust me, the flavor payoff is well worth it.
While these tenders are great on their own, feel free to get creative with dips. Honey mustard, barbecue sauce, or a spicy buffalo dip can take your chicken tenders to the next level.
It's exciting, isn't it? Having a recipe that's so versatile, quick, and mouth-wateringly good. So go on, give these chicken tenders a try. They might just become your new go-to dish.
Frequently Asked Questions
What Are Some Healthy Side Dishes to Pair With Chicken Tenders?
You're on a health kick, aren't you? Pair your chicken tenders with vibrant salads, steamed vegetables or sweet potato fries. They'll add color to your plate and vital nutrients to your body. It's all about balance.
How Can I Make a Vegetarian Version of Chicken Tenders?
You can make vegetarian 'chicken' tenders by using tofu or seitan. Marinate them in your favorite spices, dip in batter, then bread crumbs, and bake or fry until crispy. They'll mimic the real thing perfectly!
Can I Freeze Cooked Chicken Tenders for Later Use?
Absolutely! You can freeze cooked chicken tenders for later use. Just ensure they're completely cool before freezing. Wrap them tightly to prevent freezer burn. When you're ready, reheat and they'll taste just as delicious.
What Are Some Popular Dipping Sauces for Chicken Tenders?
You're asking about popular dipping sauces for chicken tenders. There're many you'd enjoy. Some favorites include barbecue sauce, honey mustard, ranch, buffalo sauce, and sweet and sour. Experiment and find what tickles your taste buds the most!
Is It Safe to Cook Chicken Tenders From Frozen?
Absolutely, you can safely cook chicken tenders from frozen. Just ensure they reach an internal temperature of 165°F. It'll take a bit longer than cooking them thawed, but it won't compromise their taste or safety.